If you’ve ever stared at a sink full of baby bottles and felt your shoulders slump a little, you’re not alone. New parents are navigating feedings, naps, diapers, and the random existential question of why is everything sticky?, so cleaning bottles can feel like one more thing on a never-ending list.
But here’s a small comfort: keeping those bottles clean doesn’t have to be complicated, expensive, or filled with mystery chemicals you can’t pronounce.
Natural cleaning just feels good. There’s something about knowing exactly what’s touching your baby’s feeding gear that brings a quiet sense of ease. It’s simple, straightforward, and strangely calming, almost like rinsing away a bit of the daily chaos.
Before we get into the nitty-gritty, let’s walk through this in a way that feels… manageable. Maybe even a little soothing.
What “Natural Cleaning” Really Means (And What It Doesn’t)
The word natural gets thrown around so often that it starts to lose meaning. For some parents, it’s about avoiding artificial fragrances or dyes. For others, it’s about using ingredients they already trust in the kitchen: vinegar, baking soda, and lemon. And for plenty of families, it’s simply about choosing cleaners that feel gentler and less harsh on a baby’s feeding gear.
But here’s the thing: “natural” doesn’t mean weaker. It also doesn’t mean you need to grind herbs under the moonlight or create a DIY potion like you’re starring in a home-care version of Harry Potter. Natural cleaning just means using simple, safe materials that get the job done without leaving behind unwanted residue.
And honestly? That’s something everyone can get behind.
Why Baby Bottles Demand Extra Attention (Without Getting Too Science-y)
Milk, whether formula or breastmilk, is rich. Fatty. Nutritious. All the things your baby needs… and all the things bacteria love. When a bottle sits out, even for a bit, that warm, creamy residue becomes a tiny playground for microorganisms you definitely don’t want hanging out near your baby’s mouth.
You might’ve noticed it before: that faint sour smell when a bottle is left for an hour too long. Or the slightly cloudy film that clings to the inside, no matter how much you swirl the water around. Those tiny things matter because baby bottles aren’t just cups with lids; they’re loaded with rings, valves, vents, and nipples that trap milk in the smallest corners.
Here’s the reassuring part: natural cleaners break down milk fat beautifully, especially when paired with warm water and the right tools. You don’t need fancy chemicals. You just need consistency, a little know-how, and some simple supplies.
The Essentials You Actually Need (No Overbuying Required)
Walk down any baby supply aisle and you’ll see about twelve thousand bottle-cleaning gadgets. Some are helpful, and some feel like inventions made out of boredom. But truly? You only need a few basic items.
1. Warm, almost hot, water
This alone does half the heavy lifting. Milk fat melts with heat.
2. A mild, baby-safe soap
Brands like Dapple, Puracy, and Attitude are popular for a reason. They’re gentle but effective.
3. Simple natural cleaners
Think:
- White vinegar
- Baking soda
- Fresh lemon
- Salt (rarely needed, but occasionally useful)
4. A bottle brush
DrBrown’s and Munchkin both make sturdy ones with soft bristles that won’t scratch.
5. A drying rack
The Boon Lawn is a favourite, yes, the “fake grass” one, but any ventilated rack works.
There’s something oddly satisfying about a clean row of bottles drying in an orderly line. Feels like a tiny parenting win.
6. A clean basin (optional but helpful)
Some parents have a separate bowl just for bottle washing. It keeps things more hygienic than using the main sink after someone rinses a greasy pan.
That’s really it. Simple, right?
Step-by-Step: How to Clean Baby Bottles Naturally (Without Stress)
This process might look long written out, but once you’ve done it twice, it becomes second nature—kind of like fastening a car seat or folding that impossibly tiny baby laundry.
1. Rinse While It’s Fresh
This step saves you later. Warm water swished inside the bottle to prevent milk from clinging.
If you’re especially tired (which, let’s be honest, is most days), a quick rinse alone can make tomorrow smoother.
2. Take Everything Apart
Unscrew the ring. Remove the nipple. Pop out the vent. Pull out whatever mysterious piece your bottle brand decided to include.
Do tiny parts multiply overnight? It sure feels like it.
But taking things apart is essential; milk hides in the grooves.
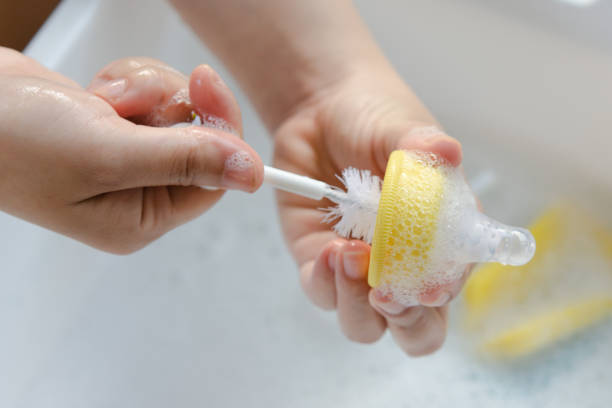
3. Wash Using a Mild Natural Soap
Add a drop or two of baby-safe soap to your brush and scrub inside the bottle.
Tips that help:
- If the bottle looks cloudy, add a pinch of baking soda and scrub with circular motions.
- Don’t forget to flip the nipple and wash the inside.
- Be gentle with silicone; harsh scrubbing shortens its lifespan.
Some parents worry about soap residue affecting taste. If that’s you, stick with mild, fragrance-free options; most baby-safe formulas are made to rinse clean.
4. Rinse Thoroughly
Run warm water through every part until the water runs completely clear.
Soap should never be left behind in tiny crevices, especially in valves or nipples.
5. Air-Dry on a Clean Rack
Air drying is the gold standard because towels can carry lint and bacteria, even when they look fresh.
I know, it seems counterintuitive. Towels feel clean. But air-drying avoids contact and reduces contamination.
Just place the bottles upside down, nipples on top of the rack pins, rings nearby, and let nature handle the rest.
Natural Deep-Cleaning Methods (Weekly or As Needed)
Parents often assume deep cleaning means chemicals, but nature has provided plenty of safe, effective options.
Vinegar Soak
Vinegar is a baby-bottle hero. It dissolves residue, kills odour-causing bacteria, and leaves bottles looking clear again.
How to do it:
- Mix 1 part white vinegar with 3 parts warm water.
- Submerge bottles and parts.
- Soak for 30–45 minutes.
- Rinse very well (like, really well) to remove the vinegar smell.
The scent does disappear completely once dry, promise.
Baking Soda Scrub
Baking soda lifts stains and deals nicely with cloudiness. It’s mildly abrasive but safe.
- Sprinkle a tiny amount into the bottle.
- Add warm water.
- Scrub using the bottle brush.
- Rinse thoroughly.
Avoid using baking soda on nipples often; too much can wear the silicone down.
Lemon Water Freshen-Up
Lemon is naturally acidic and gives bottles a fresh, clean smell. Plus, there’s something cheerful about cutting open a lemon, especially on sticky summer afternoons.
- Add lemon slices to warm water.
- Let the bottles soak for 20–30 minutes.
- Rinse well.
This is great after a stomach bug or when the bottles feel “meh” for no real reason.
Natural Sterilising Options (For When You Want That Extra Assurance)
If you don’t own a steriliser, you’re not missing out on anything essential.
Boiling water works perfectly.
Boiling Method
- Fill a pot with water.
- Add bottles and parts.
- Boil for 5 minutes.
- Remove with clean tongs and let them air-dry.
Boiling is especially helpful for newborns, NICU grads, or during illness.
Steam in a Pot
If you prefer to avoid submerging silicone nipples, steaming works nicely.
- Add a little water to a pot.
- Place a metal strainer on top.
- Add bottle parts.
- Cover and steam for 5–8 minutes.
Simple. Old-school. Effective.
Real-Life Shortcuts for Exhausted Parents
Let’s be honest: some evenings, washing bottles feels like a Herculean mission. So here are a few shortcuts that still keep things clean and safe.
- Do a warm water + vinegar “night soak.”
- Keep a small wash basin next to the sink just for bottles. It keeps things more sanitary than washing in the main sink.
- Use natural dishwasher tablets (like Seventh Generation) if your bottles are dishwasher-safe.
- Rinse bottles immediately, and wash later. Even a simple rinse prevents sourness.
No guilt allowed, real parenting involves real shortcuts.
What NOT to Use on Baby Bottles
Some products might work around the home, but they don’t belong anywhere near feeding gear.
- Bleach
- Scented soaps
- Abrasive pads or metal scrubbers
- Essential oils
- Detergents with synthetic perfumes
- Cleaning wipes
- Random viral hacks involving rice or salt inside bottles (they scratch)
Keeping it simple keeps it safe.
Troubleshooting: When Bottles Still Look or Smell “Off”
Even with solid cleaning, a few issues pop up now and then. Here’s what to do.
1. Cloudiness
Caused by minerals or fat buildup.
Use a quick baking soda scrub or vinegar soak.
2. Strange Odour
Usually caused by residue.
Try a lemon soak or leave bottles to air out in sunlight.
3. Sticky Feel
Happens when soap isn’t rinsed well.
Rewash with warm water and brush inside corners.
4. Nipple Discolouration
Silicone absorbs colour over time(especially with formula).
It doesn’t always mean the nipple is unsafe, but if it feels sticky or stretched, replace it.
5. When in Doubt, Replace Parts
Nipples, especially, should be swapped every 2–3 months, depending on wear.
A Tiny Tangent: Milk Type Matters More Than People Realise
Breastmilk has more natural fats, which stick to bottles differently. The formula can leave a grainy residue that clings to the bottom and threads. Pump parts need extra care because milk films settle in narrow tubing and valves.
If you exclusively pump, be gentle with yourself. Washing pump parts constantly is a job in itself. Many parents use a “pump parts container” kept in the fridge between sessions to reduce how often they need to wash during the day.
Small hacks make a big difference.
Consistency Without Losing Your Sanity
You don’t need a military-grade cleaning schedule.
A simple rhythm works beautifully:
Daily:
- Rinse immediately
- Wash with mild soap
- Air-dry
Weekly:
- Vinegar soak or lemon soak
- Inspect nipples for wear
The rhythm keeps things clean without turning washing into a full-time chore.
A small caddy near the sink can hold brushes, soap, vinegar, and a dish bowl. It sounds silly, but having everything together lowers friction, and when you’re sleep-deprived, convenience is everything.
Frequently Asked Questions (Parent-to-Parent Style)
“Is natural cleaning safe enough?”
Yes. Warm water + mild soap + regular cleaning is more than enough for daily use.
“Can I use vinegar every day?”
You can, but weekly is usually plenty. Daily exposure may wear silicone faster.
“Do silicone bottles need different care?”
Not really, but they absorb smells. Lemon soaks help a lot.
“When can I stop sterilising?”
Most paediatricians say daidailysterilisingn’t needed after the newborn stage unless your baby has health issues or you’re dealing with water safety concerns.
Final Thoughts: Clean Bottles, Calm Mind
Parenthood can feel messy and overwhelming, but something as simple as a clean bottle brings an unexpected sense of control. It’s a tiny ritual that keeps your baby safe and gives you a moment of quiet structure in a noisy season.
And honestly? You’re doing better than you think.
Natural cleaning doesn’t require perfection. It just needs a few simple steps, a steady rhythm, and the reminder that simpler is often better.
Whenever you find yourself staring at another bottle pile, take a breath. Warm water, mild soap, a little patience, you’ve got this.
