You can feel it in the air, that crisp, cosy stretch of the year when everything smells faintly of cinnamon, the days shrink into long, golden evenings, and suddenly, everyone’s talking about snow.
But here’s the thing: not every family gets snow. And even when you do, sometimes it’s just too cold, too wet, or honestly, too much of a hassle to bundle the baby, wrestle with the stroller, and brave the elements for ten minutes of “fun.”
That’s where indoor snowman crafts step in like an old friend. They bring all the joy, silliness, and sparkle of winter, without the chapped cheeks or frozen mittens.
And if you’re a parent (especially a new one), these little projects aren’t just about keeping busy. They’re about something softer: connection. The quiet joy of glueing, giggling, and watching your child’s face light up as they create something from scratch, that’s magic.
This guide isn’t a Pinterest-perfect manifesto (no stress, no “craft fails” shame here). It’s a warm, realistic look at DIY snowman crafts you can actually pull off at home, even if your “workspace” is the kitchen table between bottles and burp cloths.
Why Make Snowman Crafts Indoors? (Hint: It’s Not Just About the Glitter)
Let’s be honest, winter with kids can be… a lot. You’re stuck inside, daylight disappears by dinner, and the energy level somehow stays at a constant 11. But setting up a simple, hands-on project can change the tone of the whole day.
Here’s why snowman crafts are such a sweet choice:
- They’re universal. You don’t need snow, fancy tools, or a ton of space.
- They’re adaptable. Whether you’ve got a baby in a high chair or a preschooler with Opinions about scarf colour, there’s a version for everyone.
- They’re memory-makers. You’re not just making a snowman, you’re making the story of that Tuesday afternoon you spent laughing over sticky glue and googly eyes.
And let’s not forget: crafts like these double as sensory play. Soft cotton balls, smooth buttons, squishy rice, it’s all part of how little ones explore texture and coordination.
So really, these aren’t just “activities.” They’re early adventures in creativity.
Getting Ready: Setting Up Without Losing Your Mind
Before we get into the how-tos, let’s talk setup, the unsung hero of a stress-free craft session.
You don’t need a dedicated art room or a bin full of obscure materials. Honestly, most snowman crafts can be done with what’s already around the house. A few cotton balls, a pair of old socks, some glue, and a smidge of imagination, that’s it.
Here’s a quick checklist:
- Surface: Kitchen table or even the floor (lay down a newspaper or an old towel).
- Essentials: Scissors, glue (white glue or a glue stick), tape, cotton balls, paper, markers, socks, rice or beans for stuffing, and a few buttons or scraps of felt.
- Extras: Googly eyes, ribbons, pipe cleaners, popsicle sticks, or any leftover craft bits.
- Safety Tips:
- Use non-toxic glue or toddler-safe paint.
- Avoid tiny embellishments if you’ve got a baby who loves putting things in their mouth.
- Keep a damp cloth handy for quick cleanup, because glitter will find a way.
And don’t forget music! A little background, maybe “Frosty the Snowman” or a soft playlist, sets a cosy tone that makes it feel like an event instead of a chore.
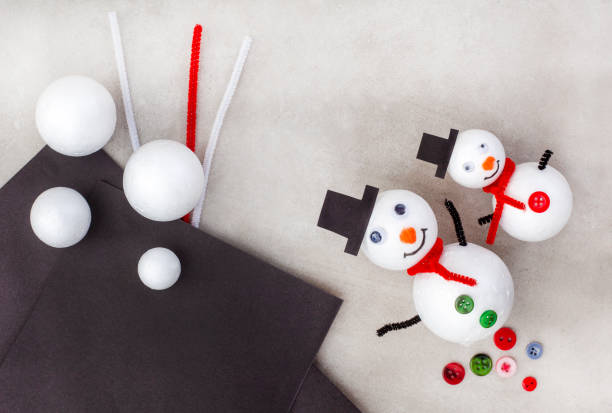
Easy (and Totally Adorable) Indoor Snowman Craft Ideas
Alright, here comes the fun part. Below are seven family-tested snowman crafts that are easy, inexpensive, and adaptable for all ages.
1. The Classic Cotton Ball Snowman
Old school? Sure. But still unbeatable. Grab a sheet of blue paper, draw three circles stacked like a snowman, and let your child glue cotton balls inside the lines.
Why it’s great: It’s soft, safe for toddlers, and quick to set up.
Extra fun: Add construction paper hats, button eyes, or a little yarn scarf.
2. The Sock Snowman (A Fan Favourite)
You’ve probably seen this one on Instagram: the adorable snowman made from an old white sock and a handful of rice.
Here’s what you need:
- 1 white sock
- 1 colored sock (for the hat)
- Rice or cotton stuffing
- Rubber bands or hair ties
- Buttons, ribbon, and markers
Steps:
- Cut the white sock just above the heel.
- Fill it with rice until you get a nice round base and a smaller top for the head.
- Secure each section with rubber bands.
- Add your decorations, button eyes, a ribbon scarf, and the top of the colored sock as a hat.
Parent tip: This one’s therapeutic. There’s something about pouring rice and shaping the snowman that’s oddly calming, even for adults.
3. Paper Roll Snowmen
Got a few empty toilet paper tubes lying around? Perfect.
Paint or wrap them in white paper, draw faces, glue on little paper arms, and decorate. They make cute table decorations or even napkin holders for a winter family dinner.
Bonus idea: Have each family member make one and line them up like a snowman family.
4. Pom-Pom Snowmen Garland
This one doubles as home décor. String together white pom-poms (you can buy them or make your own from yarn), then decorate every few as snowmen with felt hats and tiny scarves.
Hang it across a window or mantle. It’s cheerful, wintery, and surprisingly elegant.
5. Felt Snowman Magnets
Cut snowman shapes out of felt, glue on details, and stick a magnet on the back. Suddenly, your fridge becomes a winter wonderland.
If your child is a little older, this is a great project for learning simple cutting skills (under supervision, of course).
6. Puffy Paint Snowman Art
Mix equal parts shaving cream and white glue, and boom, you’ve got homemade “puffy paint.” Let your kids paint snowmen on dark paper and watch as it dries into soft, 3D snow.
It’s messy, yes, but worth it for the sensory joy alone.
7. Popsicle Stick Snowman Ornaments
Glue together popsicle sticks, paint them white, and decorate them into tiny snowmen. Add a loop of string and hang it on a doorknob, plant, or Christmas tree.
They also make great handmade gifts for grandparents, just saying.
Let’s Do This Together: Step-by-Step Walkthroughs
Sometimes, you just want someone to hold your hand through the process. Here’s a full breakdown of three of the best crafts above.
Project A: The Sock Snowman
You’ll need:
- White sock
- Rice or stuffing
- Rubber bands
- Buttons, fabric scraps, ribbon
- Marker for face
- Scissors
Instructions:
- Cut off the top of the sock (save it, that’s your hat).
- Fill the foot section with rice, tie off the top.
- Pinch the middle and tie again to create a head and body.
- Decorate: glue on buttons, draw a smile, wrap a ribbon scarf.
- Slide the cut-off sock piece on top as a hat.
Done! You’ve got a snowman that’s squishy, cute, and perfect for little hands to hug.
Project B: The Paper Roll Snowman
You’ll need: toilet paper rolls, paper, glue, markers, and optional extras (like buttons or yarn).
Instructions:
- Wrap each roll in white paper.
- Draw a snowman face and buttons.
- Cut small paper arms or twig pieces for arms.
- Tape them on.
- Add personality, maybe one’s winking, maybe another’s grumpy.
Fun twist: Line them up as a “snowman choir” and let the kids make up songs for each one.
Project C: Pom-Pom Garland Snowmen
You’ll need: white pom-poms, string, glue, and small felt bits for hats and scarves.
Instructions:
- String your pom-poms along.
- Every few, glue two together for a snowman shape.
- Add details with felt and marker.
This project is both relaxing and decorative. Parents often say it’s like meditation with glue, and they’re not wrong.
Tips & Variations (Because Real Life Isn’t Always Pinterest-Ready)
Crafting with kids isn’t about perfection. It’s about patience, humour, and flexibility. Some days, your snowman might look more like a snow blob, and that’s okay.
A few survival tips:
- Personalise everything. Let your child pick scarf colours, or even give their snowman a name (“Sir Frost Buttons” was our favourite last year).
- Keep sessions short. Ten to fifteen minutes can be plenty for younger kids.
- Work in stages. Craft a little, snack a little, finish later.
- Display proudly. Hang crafts where your kids can see them; it boosts confidence.
- Reuse materials. Old fabric scraps, paper packaging, and baby socks are all fair game.
Parent hack: Store leftover bits inadd shoebox (“Craft Rescue Kit”) so next time inspiration hits, you’re not rummaging through junk drawers.
When Things Go Wrong (Because They Will)
Glue won’t stick. Someone sneezes into the glitter. The baby eats half a cotton ball. It happens.
Here’s how to troubleshoot common snowman-crafting chaos:
- Problem: The Glue is not sticking.
Fix: Try double-sided tape or stronger tacky glue. - Problem: Pieces keep falling off.
Fix: Use hot glue only if you’re handling it; keep little fingers clear. - Problem: Toddler’s eating decorations.
Fix: Swap buttons for paper circles. Totally safe and still cute. - Problem: You’re just too tired.
Fix: Simplify. Draw the snowman instead of assembling one. Colouring counts as crafting, too.
Remember, the goal isn’t to make a museum exhibit, it’s to laugh, connect, and make something together.
Making It More Than a Craft: Turning It Into Connection
Crafting can be the start of something bigger. You can tell stories about your snowmen (“This one’s Frosty’s cousin who loves hot cocoa!”), sing songs while you glue, or even take a few photos and turn them into a family scrapbook.
If you’ve got grandparents far away, mail a snowman card made by your toddler. Trust me, that kind of thing becomes a keepsake.
And for slightly older kids, try tying crafts to learning:
- Count the buttons.
- Talk about shapes and textures.
- Guess which melts first, a real snowman or a paper one? (Cue science talk.)
These little creative moments build more than just snowmen; they build emotional warmth, patience, and teamwork.
A Quick Tangent: The Beauty of Imperfect Projects
Let’s pause for a moment. Sometimes, as parents, we fall into the trap of doing it right. Perfect crafts, neat edges, photo-worthy results. But honestly? The best memories come from the messy ones.
The snowman whose hat slid off? The one your toddler painted completely purple? That’s the one you’ll laugh about years later.
So give yourself grace. You’re doing great.
Wrapping It All Up: A Snowy Little Celebration
When you finish a snowman craft session, it’s not just about the final product; it’s about the rhythm of family life slowing down long enough for you to make something beautiful together.
Whether your snowmen line the windowsill or get crushed by a curious toddler’s hand five minutes later, the joy is the same.
And who knows? Maybe you’ll start a new tradition, the Indoor Snowman Day, where everyone wears cosy socks, hot chocolate steams on the counter, and the living room fills with laughter, glue, and bits of cotton pretending to be snow.
Because sometimes, the best winter memories aren’t made outside in the cold. They’re made right here, in the warmth of home, with sticky fingers, paper smiles, and love.
