When Baby Gear Prices Make You Blink Twice
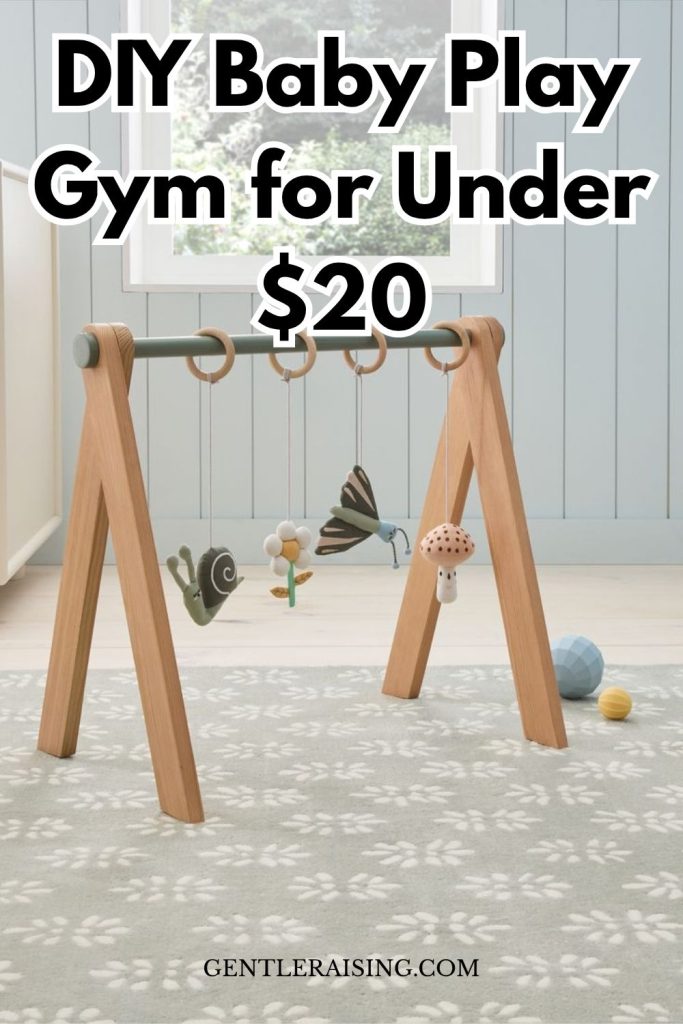
There’s something about becoming a parent that makes you suddenly aware of every single price tag in the baby aisle. One minute you’re strolling along, the next you’re staring at a $120 baby play gym wondering, “Is this thing secretly Wi-Fi enabled?”
Honestly, baby gear can feel like an emotional tug-of-war. You want the very best for your little one, anything that supports their development, keeps them entertained, and maybe even buys you a few minutes to sip lukewarm coffee. But you also don’t want to empty your wallet on something your baby might only use for a few months.
That’s where a DIY baby play gym comes in. And you know what? Making one is easier than you might think. It’s also budget-friendly, customizable, and surprisingly sentimental. There’s something about building something with your own two hands, even if you’re not crafty, that feels good. Like a tiny win in a season of life where not everything feels controllable.
So let’s create something beautiful, safe, and affordable for your little one.
Why Parents Love Baby Play Gyms (Even Before They Know They Need One)
If you’re new to the whole “baby gear universe,” a play gym might look like a simple wooden frame with dangling toys. But it’s actually a mini developmental powerhouse. Babies aren’t just staring up at cute shapes—they’re learning how to track objects, swat, grasp, kick, move, and coordinate tiny muscles they didn’t even know they had.
And here’s the quiet truth: babies stare at everything. Ceiling fans, the corner of a pillow, shadows, your face when you’re trying to pretend you’re awake. A play gym offers something more intentional, visual stimulation at eye level, gentle colours or sounds, and a safe space where they can explore using those wiggly hands and toes.
It also gives parents something priceless: hands-free minutes. Time to breathe, stretch, or send out one more “Sorry, my baby spit up on me” message.
That alone makes a play gym worth having. But building one yourself? That’s just the cherry on top.
Store-Bought vs DIY. It’s Not Really a Battle
Let’s be fair. Store-bought play gyms look polished. They come with those smooth arches, designer colours, and perfectly curated toys. But they also come with a price that sometimes feels unnecessary.
DIY, on the other hand, gives you:
- Freedom to choose materials
- Control over height and spacing
- The ability to match your nursery theme
- A price tag that won’t make your heart race
- And maybe the best part, bragging rights (“,, Oh this? I made it.”)
But here’s a small contradiction you’ll probably feel: store-bought looks “perfect,” but DIY feels “personal.” And once you see your baby swatting at something you built, trust me, the personal wins.
What You’ll Need (Affordable, Accessible, and Safe)
You don’t need a workshop or fancy tools. Just a few simple items you can find at Home Depot, Ikea, or even a local hardware store.
Materials:
- Four wooden dowels (¾–1 inch thick; about 24–30 inches long)
- One long dowel (for the crossbar)
- Cotton rope
- Sandpaper (120–220 grit)
- Non-toxic wood finish (beeswax, food-grade mineral oil, or baby-safe paint)
- Wooden rings, rattles, or silicone bead strings for toys
- A hand drill
- A hand saw or mitre saw
- Screws (optional, based on design)
If you’re going the ultra-budget route, you can even repurpose wooden broom handles or old dowels from broken home decor.
A small tip many parents forget: always smooth the wood. Run sandpaper until it feels silky under your palm, not scratchy. Babies will grab, press, and eventually mouth the toys, so everything needs to feel baby-safe.
How to Build the Play Gym Frame (Step-by-Step Without Overthinking It)
Let’s walk through it casually, no technical jargon, and you don’t need a degree to understand.
1. Cut Your Dowels (Unless They’re Already the Right Size)
Most stores will cut dowels for you, which is a game-changer if you’re avoiding power tools.
Aim for:
- 24–30 inch leg pieces
- 20–24 inch crossbar
The frame should look like an upside-down “V” on each side.
2. Sand Everything
This step takes 10–15 minutes but makes a huge difference.
You’re going for:
- No splinters
- Smooth edges
- A natural finish that feels soft to the touch
Sometimes the sanding process becomes weirdly calming, kind of like washing tiny baby onesies and feeling oddly accomplished.
3. Drill Holes at the Tops of the Legs
A hole wide enough for the rope or crossbar to pass through.
If you’re using screws instead, you’ll secure the crossbar directly.
Just remember to drill slowly. Baby gym legs don’t like rushed holes.
4. Attach the Legs to the Crossbar
This is where the structure takes shape.
There are two approaches:
ROPE STYLE:
- Fethed the rope through the holes
- Tie knots
- Adjust the spread of the legs
SCREW STYLE:
- Screw the legs directly into the crossbar
- Keep angles even
Either way works.
5. Add a Finish (Optional but Nice)
Beeswax polish gives wood a warm, soft look.
Baby-safe paint is great if you want pastel ends or seasonal colours
Avoid anything glossy, thick, or heavily scented.
6. Test the Stability
Give it a gentle shake.
If it wobbles, widen the legs or tighten the rope.
If it still wobbles, don’t worry. It happens. Adjustments fix almost everything.
Making the Hanging Toys (Cute, Safe & Infant-Friendly)
You can get creative here. Some parents go minimal; others go full Etsy-mode. Both are okay.
Options for Toys:
- Wooden rings
- Crochet animals
- Fabric shapes filled with crinkly material
- Silicone bead strings
- Soft rattles
- Seasonal themes (pumpkins for fall, stars for holidays, little safari animals)
Remember:
Anything hanging must be at least the size of a large egg. No tiny parts. No loose knots.
Babies tug harder than you think, like they’re testing the structural integrity of the world.
One trick parents swear by:
The Tug Test
Pull the toy as hard as a grown adult might.
If it stays, it’s good.
If it comes off, redo it. No shame in repeating a knot.
Safety Guidelines Every Parent Should Know
Baby play gyms are simple, but they still need d safe design. Keep these quick tips in mind:
- Don’t use varnished or untreated wood
- Avoid yarn that can fray into loose threads
- Keep toys short enough that the baby can’t wrap them
- Check knots every few days
- Never leave the baby unsupervised
- Stop using the gym once the baby can pull up
A small repetition here, because it matters: keep checking those knots.
Budget Breakdown: How Much You Actually Save
Prices vary by region, but here’s a realistic estimate:
- Wooden dowels: $6–$10
- Rope: $2–$5
- Sandpaper: $2
- Finish: $5–$8
- Hanging toys: $6–$15 (DIY or bought)
Total: $25–$40
Compare that to $80–$150 for store-bought versions.
Even if you splurge a little on nicer toys, you’re still saving a good chunk.
And honestly, the satisfaction of making something yourself? Hard to price.
Fun Customisations (Make It Fit Your Baby’s Personality)
You don’t have to stick to the basic wooden look.
Ideas You’ll Actually Enjoy:
- Add pastel tips to the legs
- Wrap the centre bar with cotton rope for texture
- Make themed toys (rainbows, animals, shapes)
- Use seasonal colours, sage greens, warm browns, mustard yellow
- Add your baby’s name on a small wooden tag
But here’s the thing: simple often looks the best in photos and in real life. Too many toys or colours can overstimulate babies. Minimalism isn’t just trendy; it’s calming.
Also, don’t be surprised if your gym ends up on your Instagram stories more often than expected. Babies somehow make everything look better.
Common DIY Mistakes (And How to Avoid Them)
Let’s talk about things parents sometimes get wrong, not to shame, just to guide.
1. Not sanding enough
Splinters can sneak up on you.
2. Hanging toys too low
Keep them reachable, not face-smacking height.
3. Usia ng a weak rope
Rope should feel sturdy, not stretchy.
4. Overcrowding toys
Three to four toys are usually enough.
5. Forgetting to check knots
I’m mentioning this again on purpose.
How to Introduce Your Baby to the Play Gym
You don’t need to wait long; babies can use play gyms from a few weeks old.
Tips:
- Place the baby on a firm mat or blanket
- Start with high-contrast toys
- Keep sessions short in the beginning
- Add a mirror nearby (babies love faces, including their own)
- Mix it with tummy time for more engagement
A helpful reminder: if your baby seems uninterested at first, that’s normal. Some babies warm up slowly. Others act like they’re in a mini amusement park from day one.
Cleaning, Maintenance & Making It Last
Wooden play gyms are easy to maintain:
- Wipe down with a damp cloth
- Reapply beeswax occasionally
- Wash fabric toys weekly
- Check for loose pieces
- Store in a dry area when not in use
If you’re planning on more kids later, your DIY gym can last for years with proper care.
When to Retire or Repurpose It
Babies grow quickly, sometimes shockingly so.
RRetreatto the gym when your baby:
- Starts pulling up
- Attempts to chew the crossbar
- Tries to climb it (yes, they will)
You can repurpose the frame by:
- Turning it into a toddler clothes rack
- Making it part of pretend play (a small puppet show stand)
- Decorating it for the nursery displays
Parents get creative with these things.
Final Thoughts: You Made Something Meaningful
Building a DIY baby play gym isn’t just about saving money. It’s about creating something with love woven into every knot, smooth dowel, and tiny detail. It shows resourcefulness, care, and a willingness to learn something new, even when life feels busy and messy.
And honestly, there’s something special about watching your baby reach up toward something you crafted. It reminds you that parenting isn’t about buying the most expensive gear. It’s about finding meaningful ways to support your child while staying grounded.
So if you’re making this play gym, good for you. You’re doing great. And your baby will absolutely love it.